Crystal Reports has been excluded In VS2010. Yes, what you just heard is right. That means, if you install VS 2010 then you will not get Crystal Reports built-in.
But don't worry it is available as a separate download from the SAP web site.
To download Crystal Reports, click on the following link:
Introduction This is my first article. In this article, I will show you a simple Crystal Report creation process with screenshots using Visual Studio 2010. Because a picture is worth more than a thousand words, so I always believed in an article with screenshots is much better.
Let's start by creating a new website in VS 2010.
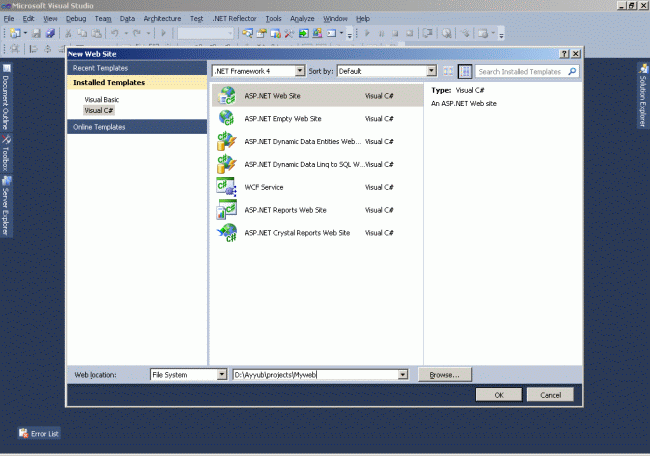
Open VS 2010, select Visual C# and ASP.NET Web Site and click OK as shown below.
This action will create a new Web site project.
Once
we have a Web site project created, next step is to get database access
in the project. That we do using a DataSet from a database.
Creation of Dataset (xsd) File- The following figure shows you the process to create a DataSet file.
- To add a DataSet file, click on Solution Explorer -> Right Click on Project -> click on Add new Item and then it will show you the following screen:

- Enter the Datset file name. Click on the ok button.
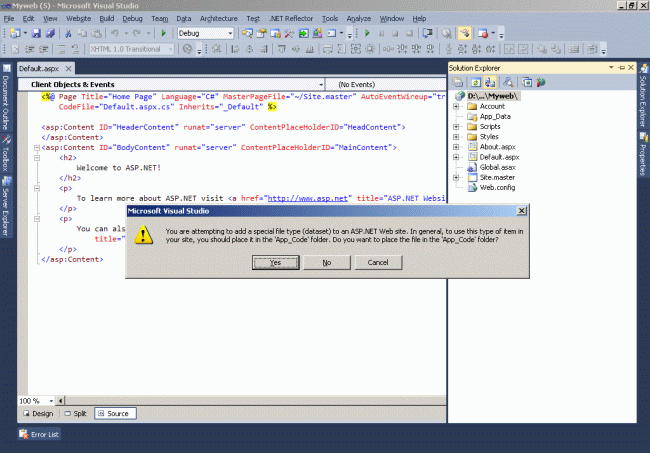
- It will ask for confirmation to put that file in the App_Code folder. Just click yes and that file will opened in the screen as a blank screen.
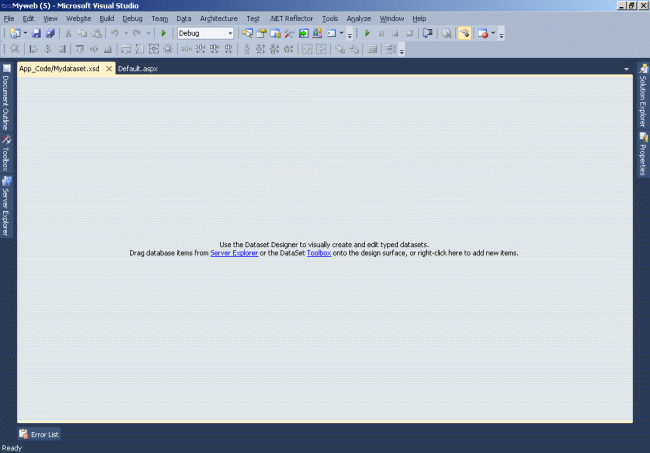
- Now we will add one blank datatable to that mydataset.xsd.
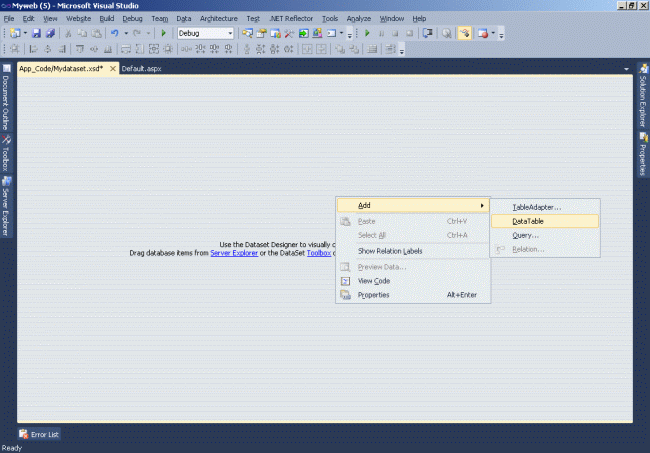
- Right-click in the area of the file and select Add -> Datatable.
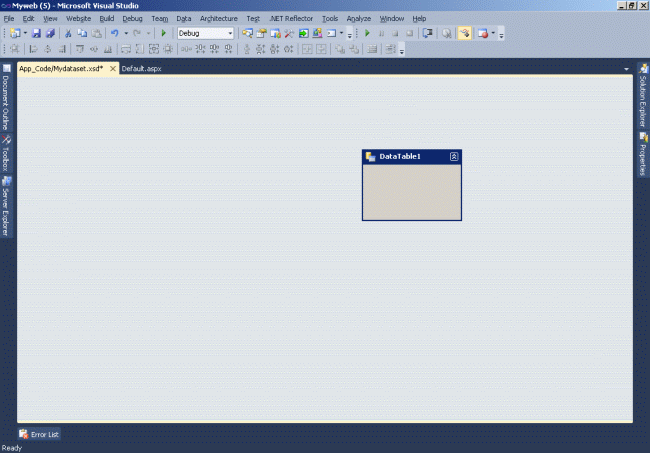
- It will add one DataTable1 to the screen.
- The following Figure 5 shows how to add a datatable to the mydataset.XSD file.
- Now datatable1 is added to XSD file.
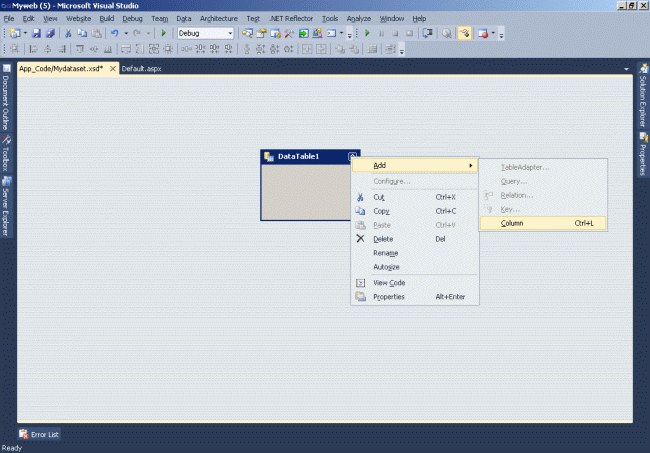
- Now we will add a data column to the datatable1 as per figure 6.
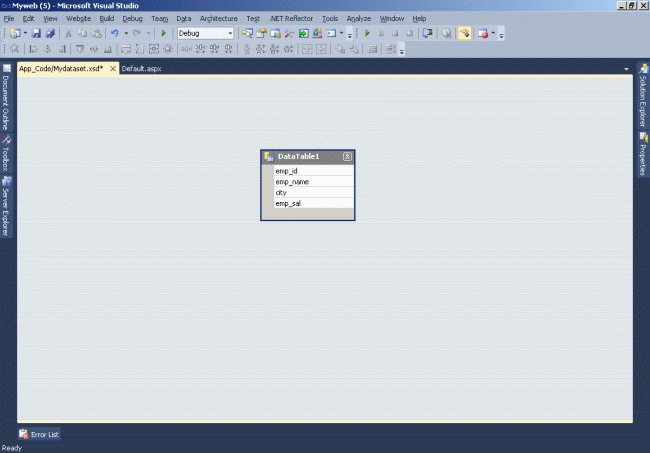
- Remember, whatever columns we add here will be shown on the report.
- So add the columns you want to display in your reports one by one here.
- Always remember to give the same name for the column and data type of column which is the same as the database, otherwise you will get an error for field and data type mismatch.
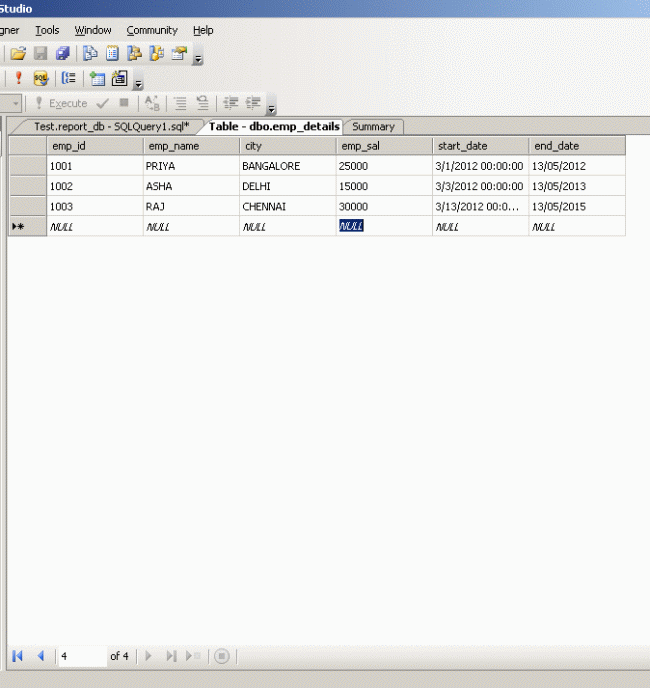
- To set property for the columns the same as the database.
- The following figure will show you how to set the property for the data columns.
- The default data type for all the columns is string.
- To change the data type manually right-click on the datacolumn in the datatable and select property.
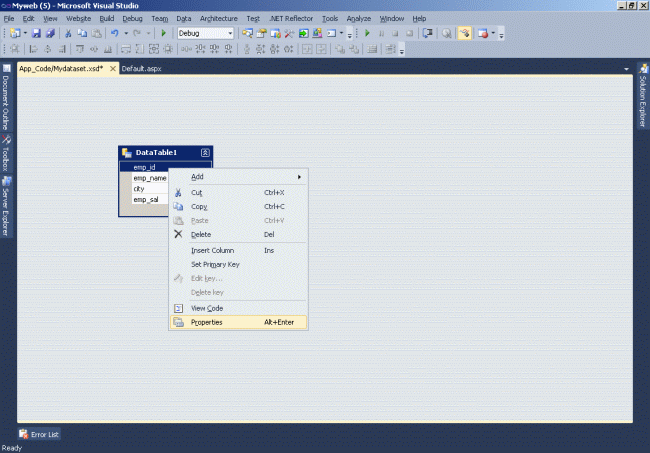
- From the property window, select the appropriate datatype from the DataType Dropdown for the selected datacolumn.
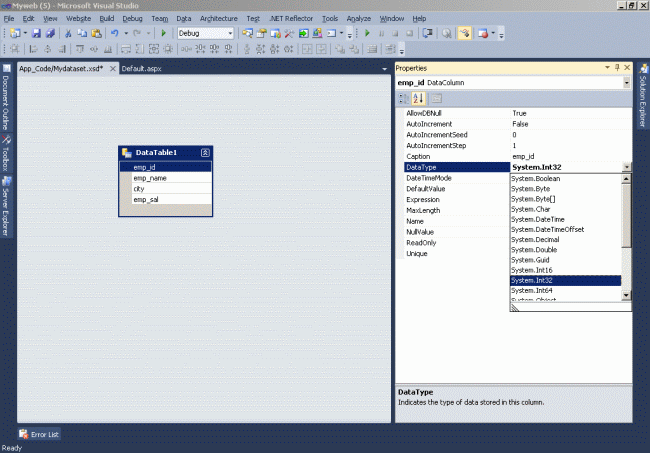
- XSD file creation has been done.
- Now we will move on to create the Crystal Reports design.
- Click on the Solution Explorer -> Right click on the project name and select Crystal Reports.
- Name it as you choose and click the add button.
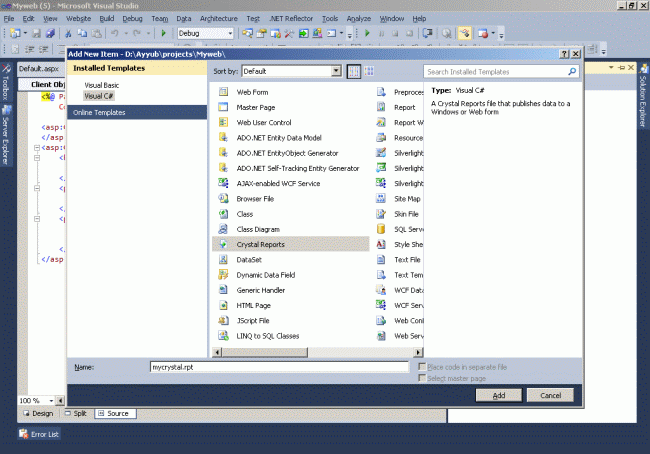
- After clicking on the add button a .rpt file will be added to the solution.
- It will ask for the report creation type of how you want to create the report.
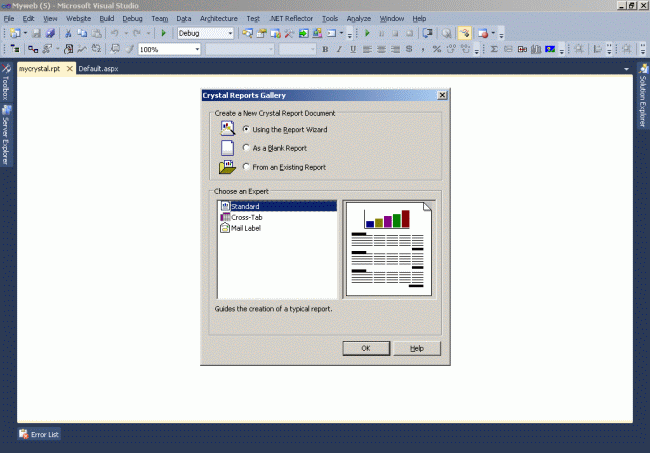
- Click the ok button to proceed.
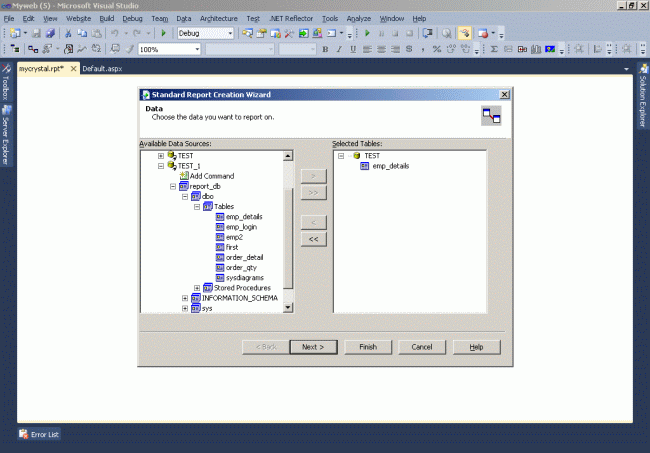
- Under Data Sources, expand ADO.NET Datasets and select Table and add to the selected table portion located at the right side of the window using the > button. Click on Next.
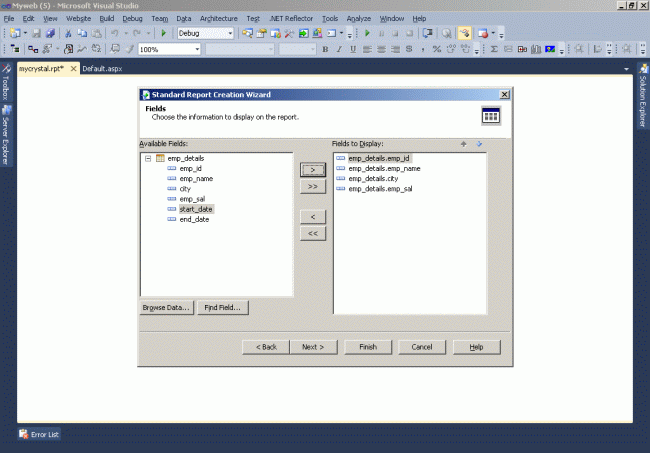
- Select the columns that you want to show in the report.
- Now click on the Finish button and it will show the next screen.
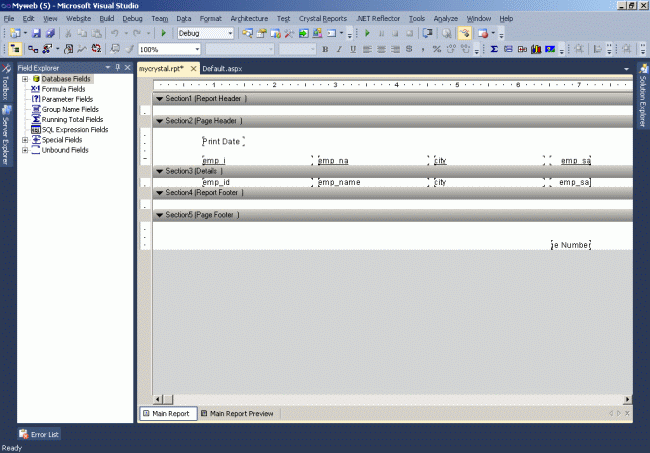
- Once the report file is added, you can see the Field Explorer on the left side of the screen.
- Expand Database Fields, under that you will be able to find the Datatable that we have created earlier.
- Just expand it and drag one by one each field from the Field Explorer to the rpt file the under detail section.
- Now the report design part is over.
- Now we have to fetch the data from the database and bind it to the dataset and then Show that dataset to the report viewer.
- First Drag a CrystalReportViewer control on the aspx page from the Reporting Section of the tool box.
- Add a command Button.
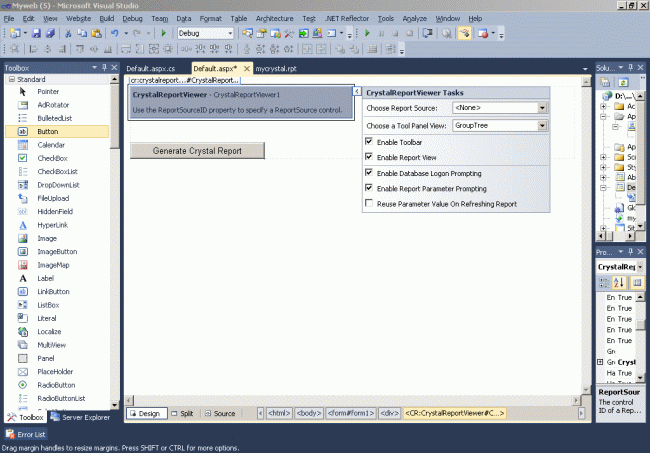
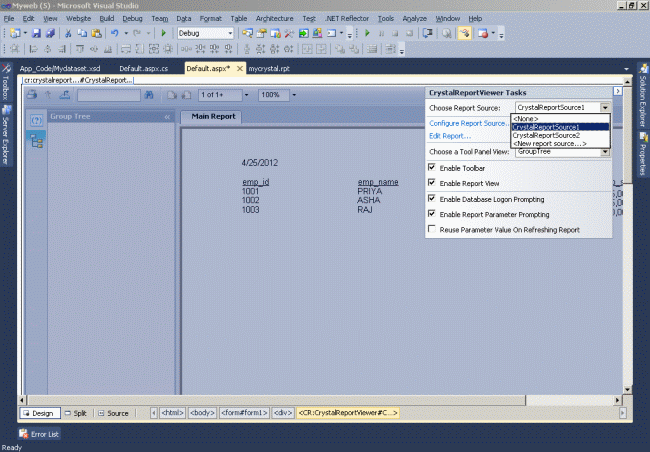
- Configure the CrystalReportViewer and create a link with Crystal Reports.
- Select the Crystal Reports source from the right side of the control.
The following is the final code for reports (Default.aspx).
Code
using System;
using System.Collections.Generic;
using System.Linq;
using System.Web;
using System.Web.UI;
using System.Web.UI.WebControls;
using CrystalDecisions.CrystalReports.Engine;
using CrystalDecisions.Shared;
using System.Data;
using System.Data.SqlClient;
using System.Configuration;
public partial class _Default : System.Web.UI.Page
{
protected void Page_Load(object sender, EventArgs e)
{
CrystalReportViewer1.Visible = false;
}
protected void cmdcrystal_Click(object sender, EventArgs e)
{
CrystalReportViewer1.Visible = true;
ReportDocument rDoc = new ReportDocument();
Mydataset dset = new Mydataset(); // dataset file name
DataTable dtable = new DataTable(); // data table name
dtable.TableName = "Crystal Report "; // Crystal Report Name
rDoc.Load(Server.MapPath("mycrystal.rpt")); // Your .rpt file path
rDoc.SetDataSource(dset); //set dataset to the report viewer.
CrystalReportViewer1.ReportSource = rDoc;
}
}
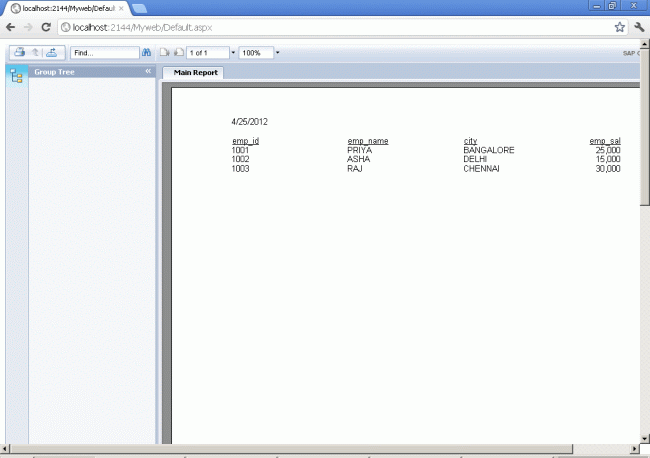
OutPut
Summary
Crystal Reports template is not a part of Visual Studio 2010 anymore but you can download Crystal Reports support from SAP website. In this article, I demonstrated step by step procedure of creating a Website project and add a Crystal Report support. After that, I created a DataSet from a database and in the end, built a report displaying data from the database.
No comments:
Post a Comment